Apartments and buildings
Buildings shows every building of a property with its apartments, floor by floor, and opens the history of any apartment. A short set-up guide places the apartments you already have into buildings and floors, so a notice can go to one building only.
- Who sees it
- Everybody on the team sees the Buildings tile and reads it. The owner, the manager, the property manager, the maintenance supervisor and the person left in charge can change buildings and floors.
- Where to find it
- The Buildings tile on the home screen, next to Map.
- When it is on
- This part is always on. It has no switch. Only the 3D view inside it depends on the 3D buildings module.
What it is for
Properties usually think in buildings: "the water is off in Building 4". Buildings gives each apartment its building and its floor, so the whole team and the resident notices use the same names. It also keeps the story of every apartment in one place.
Look at a building and its apartments
- Open Buildings
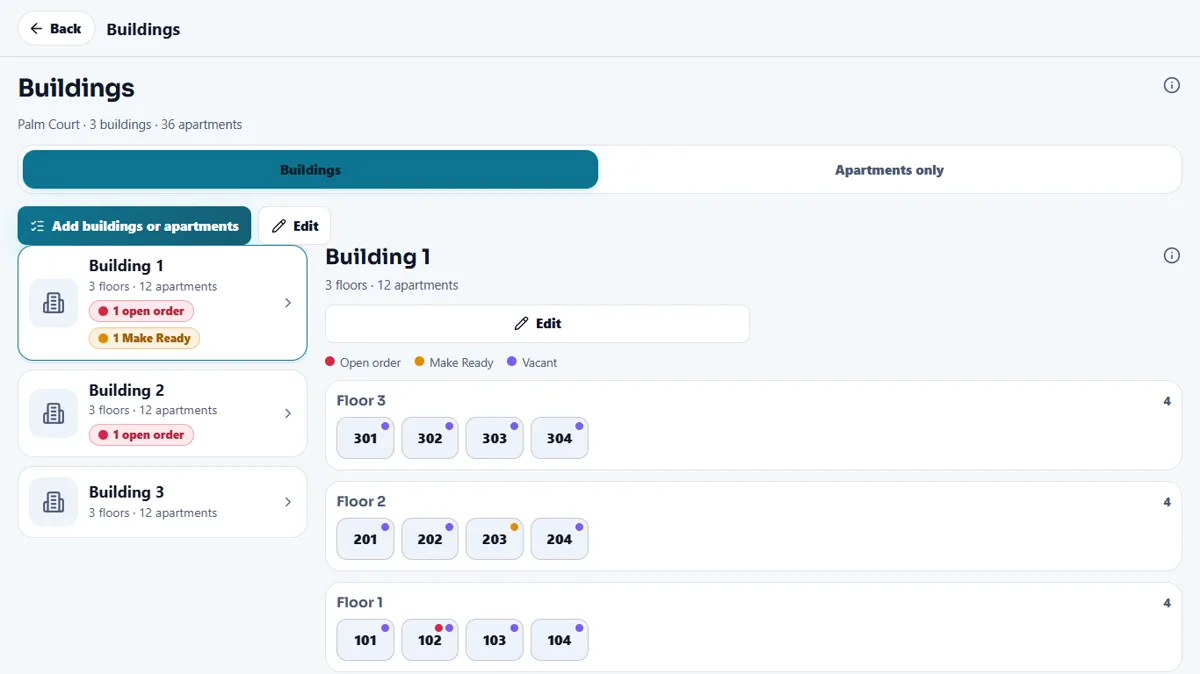
Tap Buildings. If you have more than one property, choose it first. The top line says how many buildings and apartments it has.
- Pick a building
Each card shows the floors, the apartments and, when there are any, open orders and Make Ready. Tap one to see its floors, the top floor first.
- Read the dots
A colored dot on an apartment means Open order, Make Ready or Vacant. The legend explains them. Make Ready dots only show when the Make Ready module is on, and Vacant needs the Resident portal.
- Find one apartment
Open Apartments only. Type the start of a number (12 shows 1201, 1202…) and narrow by Building and Floor.
Open the history of an apartment
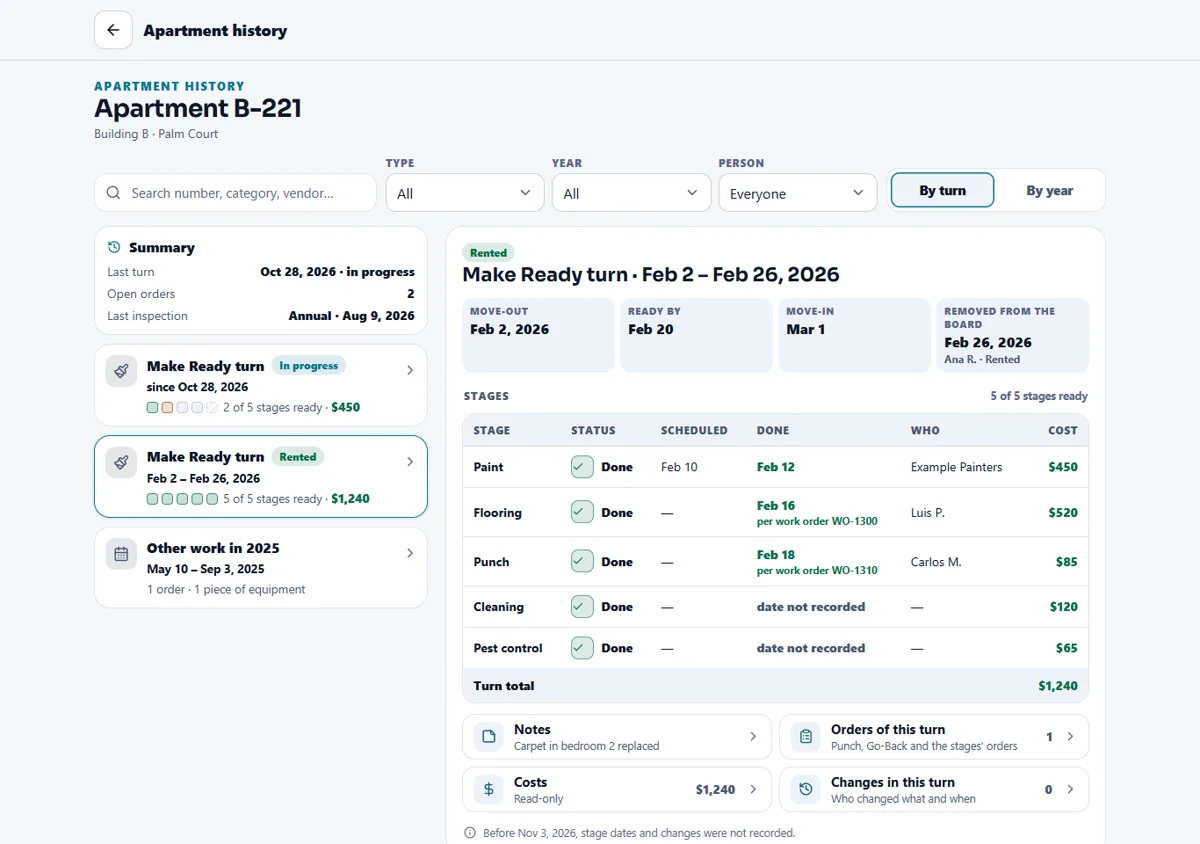
Tap any apartment to open its history. It is read-only: nothing here changes an order, a cost or an inspection.
- Read the summary
The Summary shows the last turn, the open orders and the last inspection.
- Choose a turn or a period
On a computer the turns and periods are on the left and the one you chose on the right. On a phone it is one timeline by month, newest first. A Make Ready turn lists its stages, dates, who did each one and the cost when you may see it.
- Filter
Search by number, category or vendor, and filter by Type, Year and Person. Switch between By turn and By year.
The history shows only what your role may read. Money appears only for people who may see it, and the words a resident wrote in a request are never copied into the history.
Set up buildings and floors with the guide
The guide arranges the apartments you already have into buildings and floors, one building at a time. It never creates an apartment, never moves one without asking you and never saves a floor from a guess. Only the supervisor, the property manager, the manager and the owner can run it.
- Step 1: how many buildings
Tap Set up buildings. Choose how many buildings the property has and what they are called: 1, 2, 3…, A, B, C…, I type them, or The ones I have if your apartments already carry building names.
- Step 2: one building at a time
For each building say how many floors it has, how the numbers are written (for example floor + number, 101) and how they spread over the floors. Type the first and the last apartment number, like 101 and 116: the apartments that exist in between are filled in. Add exceptions one by one. The guide shows how it would look and marks floors as suggested until you confirm them.
- Step 3: check before saving
Review each building, the apartments that would change building, and the numbers that do not exist. Nothing is saved until you tap Verified, complete. An apartment that is in another building today only moves if you tick it.
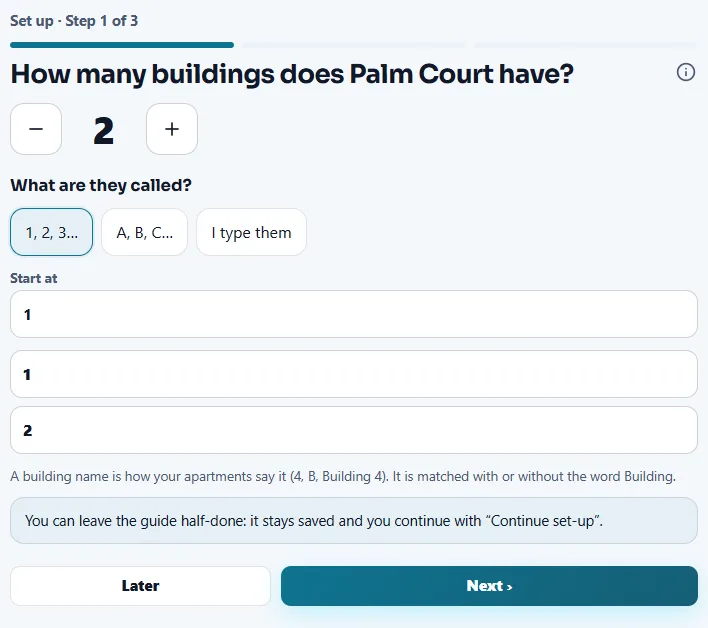
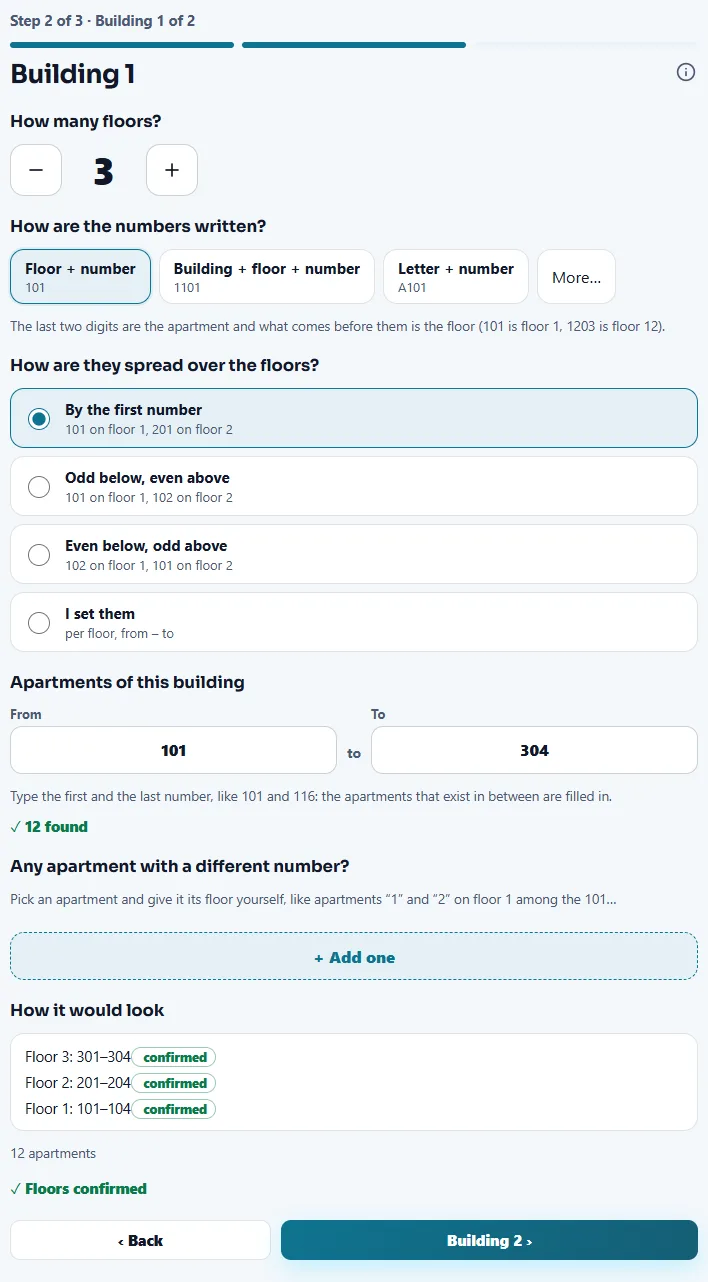
You can leave the guide half-done. It stays saved, and the button changes to Continue set-up. When it is finished the button reads Add buildings or apartments. To fix a single apartment, use Edit and write its building and floor. Nothing is saved until you tap Save.
Send a notice to one building
When the Resident portal is on and you may send notices, open a building and tap Notify the building. The new post opens already aimed at that building. See Resident announcements and events.
3D view
With the 3D buildings module on, a building also has View in 3D, and an Equipment button that lists what is placed in it. See 3D buildings.
Tips
Run the guide before the first notice to a building. An apartment with no floor waits in No floor until someone sets it. An apartment with no building waits under No building.
Related guides
Ready to try it with your own property?
Create your workspace, add your property and turn on the modules you need.